How to learn English typing for free at home?
So friends, we will teach you how you can learn English typing for free at home.
Different lessons are given here, by practicing which you can learn typing very easily.
After completing all these lessons, you are given separate articles to practice in which you will get words from basic to advanced to practice. If you practice and complete all of them, then you will not need to go anywhere else.
You have to keep some things in mind while learning typing.
First of all, know the keyboard as you can see in this keyboard.
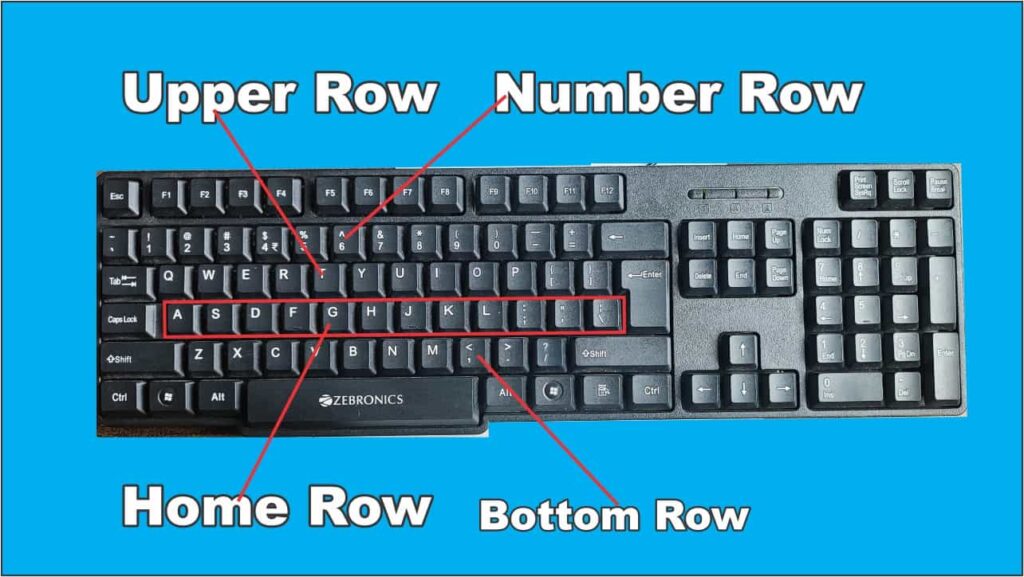
This is called home row. The line below the home row is called bottom row and the line above the home row is called upper row and the line above the upper row is called number row.
First of all, let us know what is touch typing?
What is touch typing?
Touch typing is a method in which you type words accurately and quickly without looking at the keyboard, using your 10 fingers. If you follow the rules of touch typing and complete its course, then you will be able to:
Type the word very fast.
Type the word without any mistake.
Type the word without looking at the keyboard.
Type the word without any mistake.
This means that if you learn typing properly, then you will be able to fulfill your daily needs, such as if you have to work in an office or a government office, you will be able to complete it very easily.
To learn typing, you should have a computer or laptop and a good keyboard as well.
First of all, place your computer and keyboard on a table.
Then sit properly on a chair that is suitable for you.
Before starting typing, there are some rules that you must read:
1. Maintain proper posture:
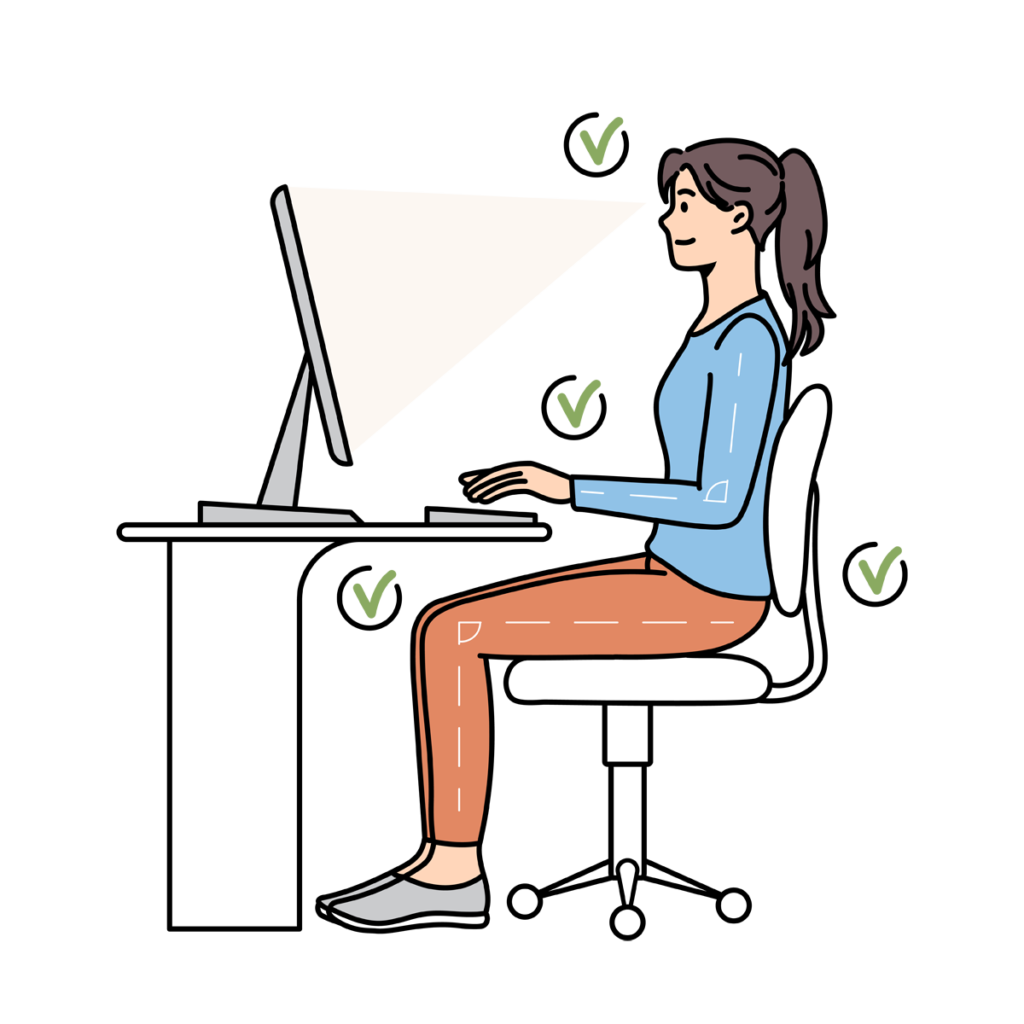
Make sure that your fingers are slightly bent and located above the keys, your wrists are comfortably resting on the table. Avoid putting too much pressure on your wrists. Sit up straight with bent elbows. Good posture improves accuracy and helps reduce stress on your arms, hands and shoulders over time.
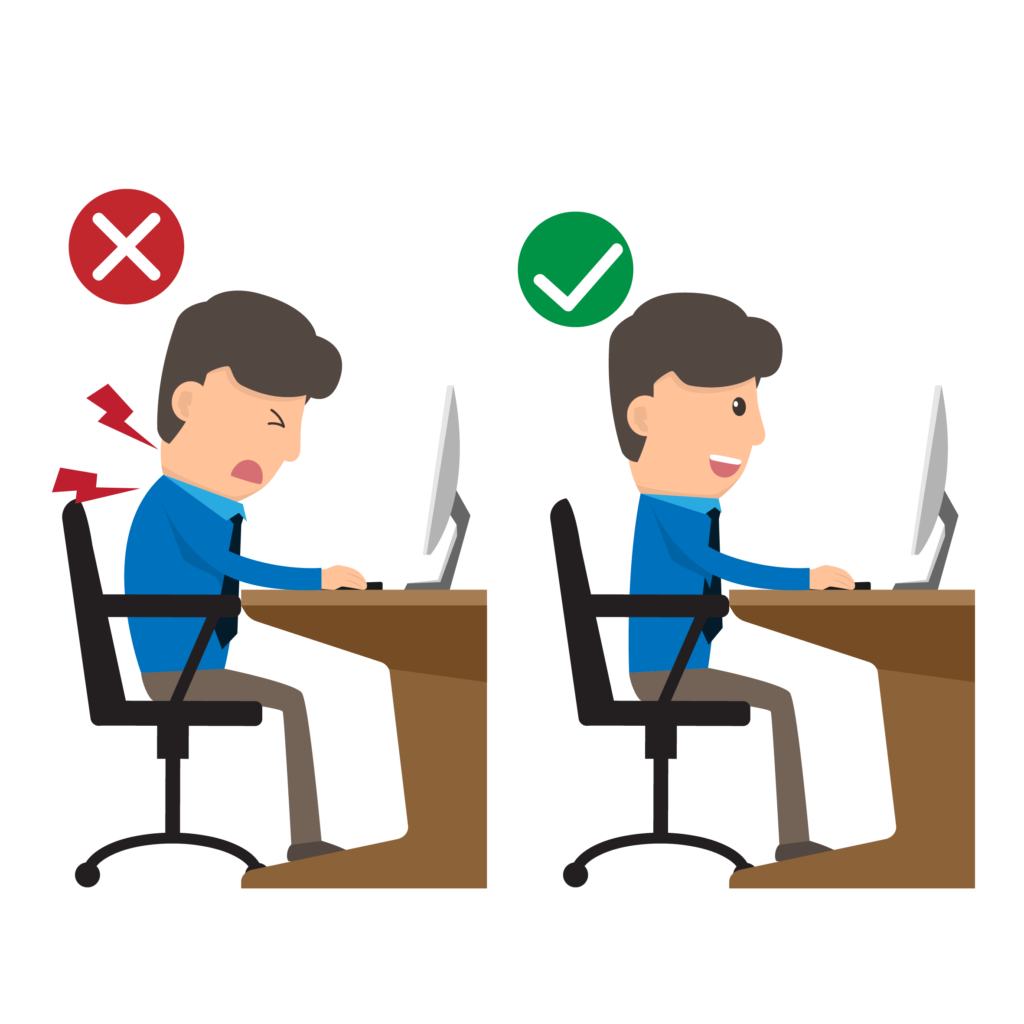
2. Master finger positioning:
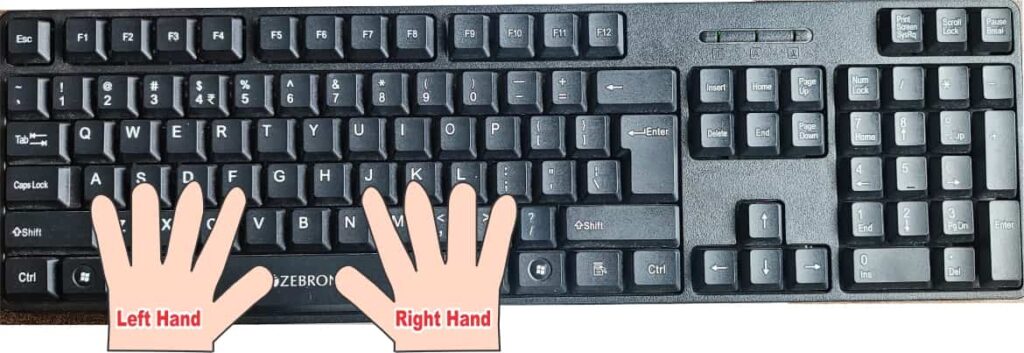
Familiarize yourself with the home row keys. The fingers of your left hand should rest on A, S, D and F, with your little finger on A, while the fingers of your right hand should be on J, K, L and ;, with your index finger on J. This position allows you to always know where the letters are and makes it easier to reach most keys on the keyboard.
If you already type using all your fingers, make sure you always reach the right keys. Practice returning to the home row if necessary. Most keyboards have small raised protrusions on the F and J keys to help you find your way without looking.
Try not to look at the keyboard repeatedly while typing.
3. Understand finger functions:
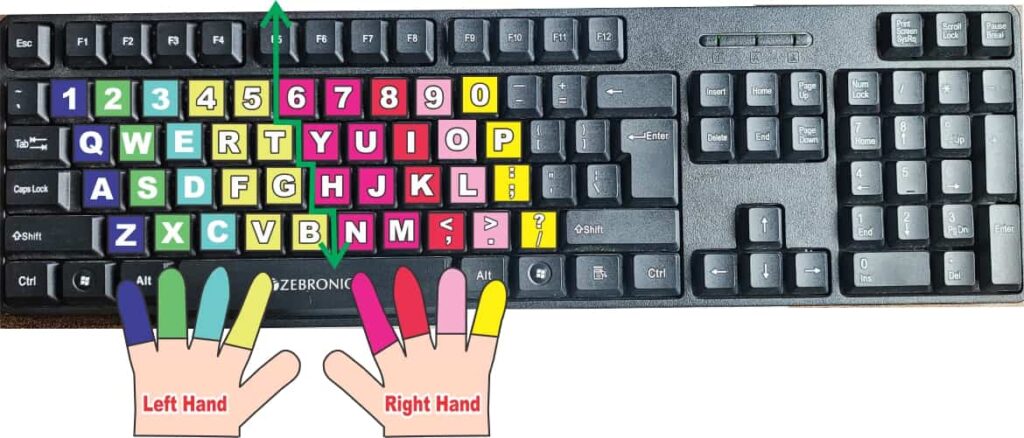
Each finger is responsible for typing specific letters and numbers, usually following a diagonal pattern to the right. For example, the little finger on your left hand types 1, Q, A and Z, while the index finger types 2, W, S and X. Both index fingers also cover adjacent rows, such as the right index finger types 7, U, J and M, as well as 6, Y, H and N.
4. Use your little finger for special keys:
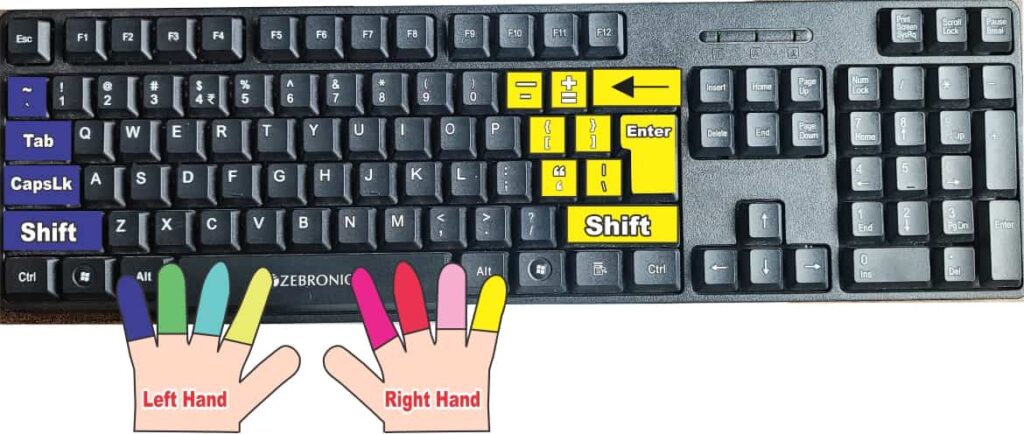
Use your little finger to press the “Shift” key, usually the key opposite the one you are typing. The little finger is also used to press “Tab”, “Caps Lock”, “Ctrl” punctuation, “Backspace” and the arrow keys.
5. Place thumb on space bar:
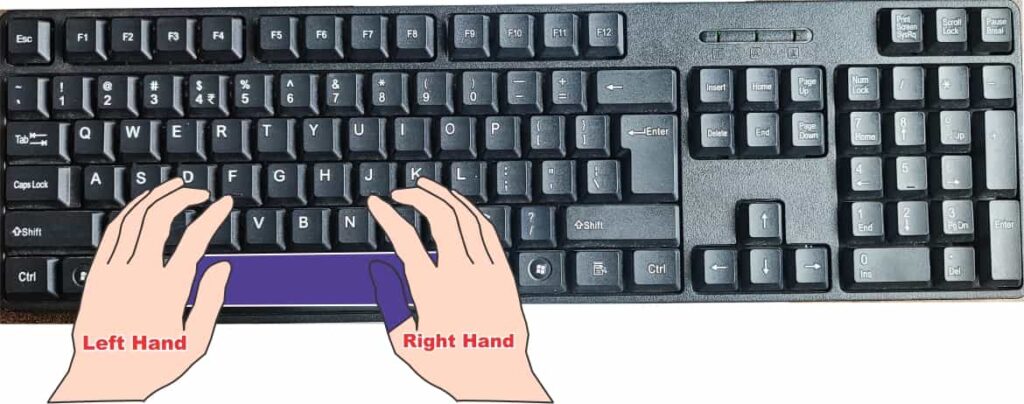
Always place at least one thumb on the space bar. This practice ensures that you do not have to move your hands to create spaces between words, which will save time and increase efficiency.
Note: Which thumb should be used to press the Space key?
If you are a lefty then you should press the Space key with your left thumb and if you are a righty then you should press the Space key with your right thumb.
hiii